Content Manager & CSP
Draft · under reviewWhy you need them
- Content Manager (CM): a third-party launcher that all but replaces the stock UI — managing cars / tracks / mods, joining servers online, screenshots and graphics all run through it.
- Custom Shaders Patch (CSP): adds modern lighting, weather, traffic and more. Many new mods and servers require CSP to run.
1. Install Content Manager
Download it from the official site: https://acstuff.ru/app/
- Unzip the archive and find
ContentManager.exe. - Put it somewhere permanent (your desktop or a dedicated folder), then run it.
Don’t put
ContentManager.exeinside the game’s root folder. Keeping it outside stops Steam’s file verification from deleting it or causing problems.
First-run setup
- Root folder: CM asks where the game is installed. The Steam default is usually
C:\Program Files (x86)\Steam\steamapps\common\assettocorsa— if you can’t find it, use the method from the previous level (right-click the game → Manage → Browse local files). - Steam ID: CM detects this automatically; confirm if prompted.
- Plugins: CM may offer optional plugins such as 7-Zip integration. Not needed for the basics, but handy for managing mods. You can add or remove them later under
Settings → Content Manager → Plugins.
The free version is enough
CM comes as Lite (free) and Full (unlocked by donation).
- Lite already covers all the core functionality — managing content, driving, and game settings. That’s plenty for almost everyone.
- Full adds: pre-release and experimental builds, online server creation and management, custom offline championships, advanced modding tools (including custom showrooms), and dynamic weather in CSP.
To upgrade, donate, then enter the key you receive under
Settings → Content Manager → General → Change.
2. Install CSP
Download it from the official site: https://acstuff.club/patch/
Downloads are named like this:
lights-patch-v0.X.XX.zip                 ← regular release
lights-patch-v0.X.X-previewXXX-full.zip  ← preview build (enables rain)
Two ways to install
Manually (recommended)
- Extract the archive’s contents straight into your game root folder, allowing it to overwrite when prompted.
- Restart Content Manager.
Drag into CM
- Open CM and drag the
.zipinto the window. - CM offers to install CSP — confirm and wait.
- Restart CM here too.
Always restart CM after installing CSP. Otherwise the CSP settings panel may fail to load, or show stale settings.
Enabling it
Go to Settings → Custom Shaders Patch → General Patch Settings and tick the checkbox at the top. The left sidebar lists the modules (WeatherFX, LightingFX, ExtraFX and so on) — turn them on or off as you like.
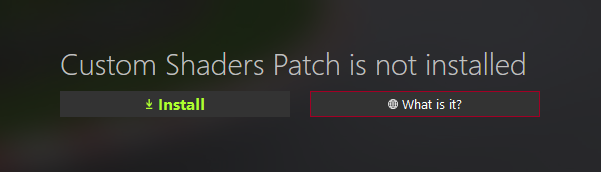
Before it’s installed, that page just tells you so, with an Install button:
Which version
- Recommended — the one flagged as such on the download page. The best balance of stability and features; start here.
- Preview — early access via Patreon. New features ahead of time, rain, and required by some of the newest mods.
- Buggy / untested — experimental builds. Leave them alone unless you specifically need one.
You can roll back. If a newer CSP causes trouble, install an older
.zipthe same way — CM overwrites the existing files.Also note some servers require a specific CSP version; switch as needed.
Next
With both in place, you’re ready to install mods.